

Automatically Forwarding Emails in Gmail
Forwarding emails automatically can help you cut through your email account's digital clutter. Whether you're the head of a bustling startup or the leader of a midsize enterprise, mastering mail forwarding on Gmail can streamline your communications and make sure no important messages slip through the cracks.
By setting up Gmail automatic forwarding, you fortify your business against common issues associated with delayed responses, information silos, and overlooked messages hidden within crowded inboxes.
1. Set Up Email Forwarding in Gmail
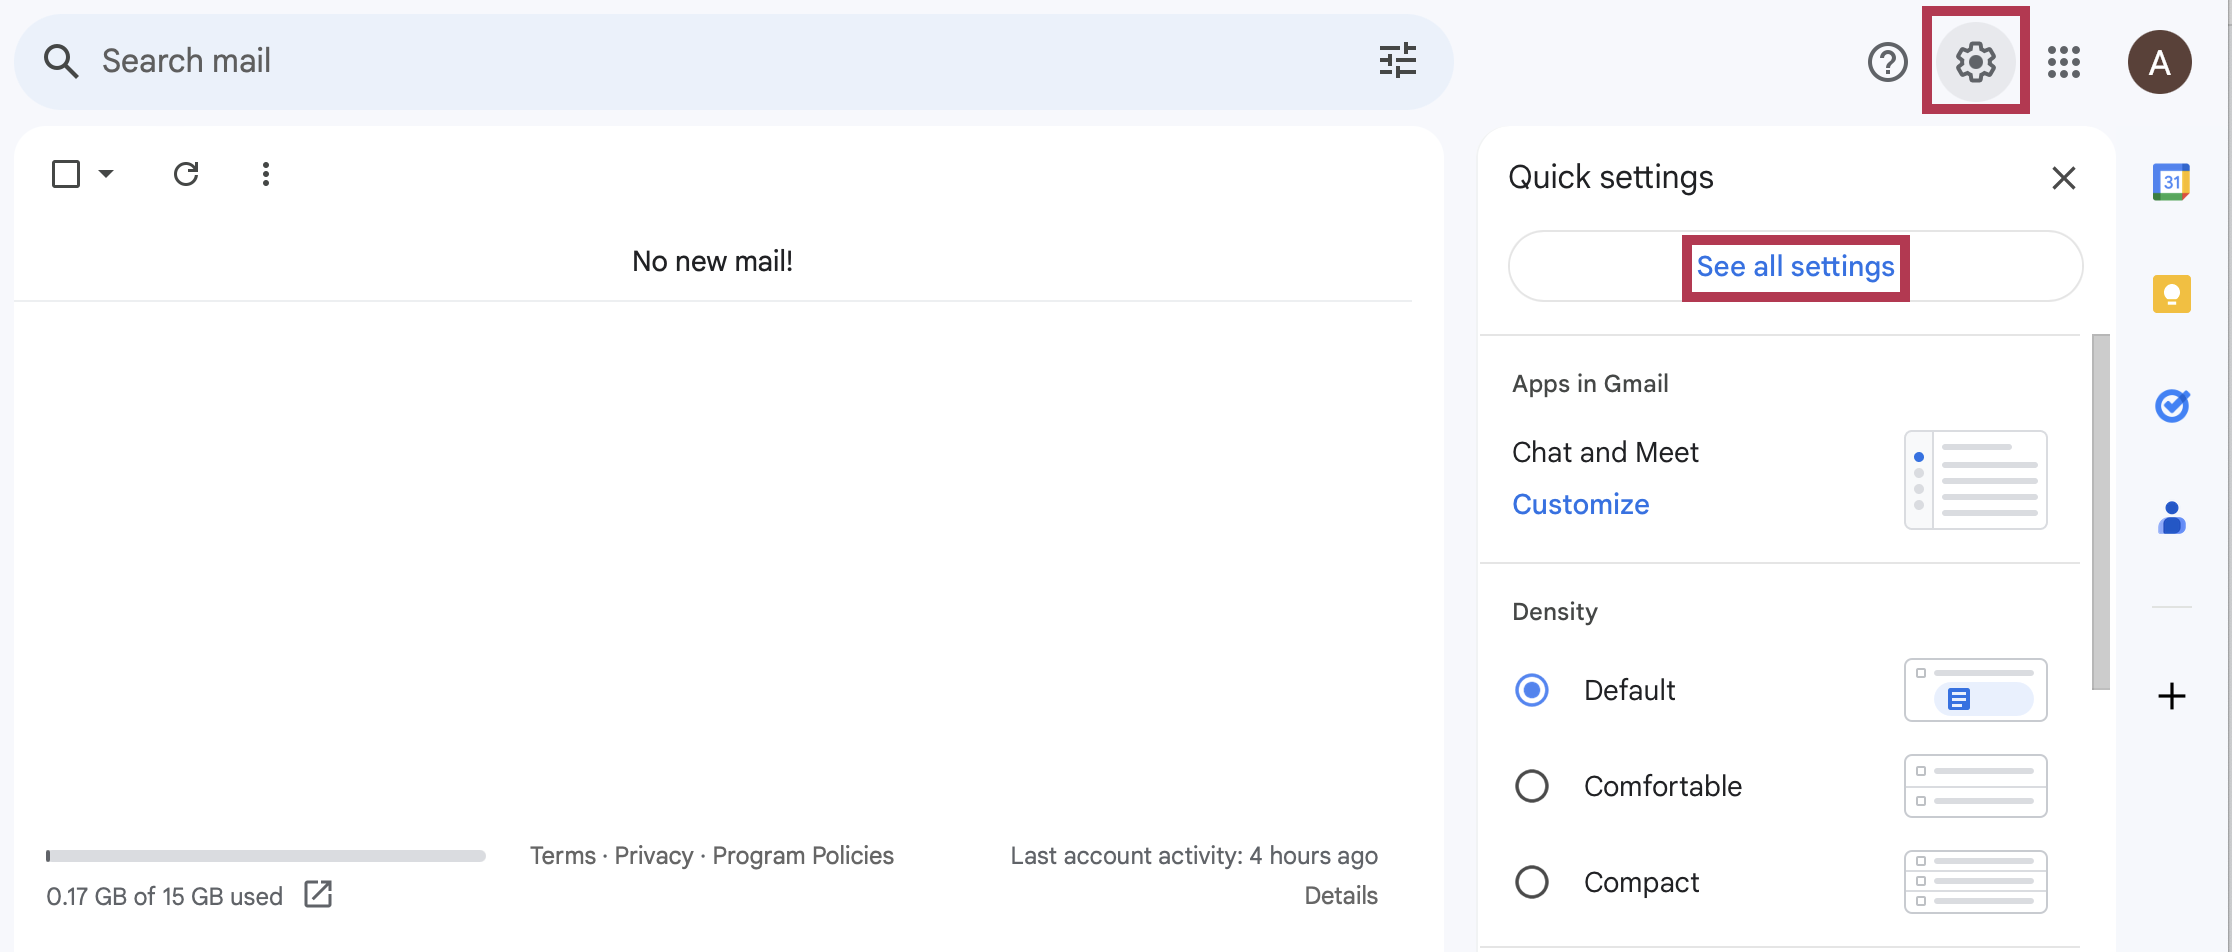
- Sign in to your Gmail account and click on the gear icon in the top right corner.
- Select See all settings.
- Go to the Forwarding and POP/IMAP tab.
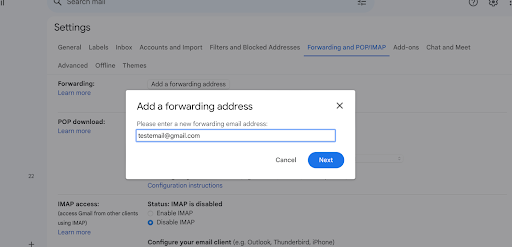
- In the Forwarding section, click Add a forwarding address.
- Enter the email address you want to forward your messages to.
- Select whether you want to keep a copy of the emails in your Gmail inbox or delete them after forwarding.
- Click Save Changes.
2. Filter Specific Emails to Forward
If you only want to forward emails that meet certain criteria, you can create a filter. Here's how:
- Open Gmail and click on the search bar.
- Enter your search criteria. For example, you could search for emails from a specific sender or with a specific subject line.
- Click on the Show search options link.
- Click on Create filter.
- Select Forward it to and choose the email address you want to forward the emails to.
- Click Create filter.
3. Forward Emails from a Specific Address
If you want to forward all emails from a specific email address, you can add a forwarding address to that account. Here's how:
- Sign in to the email account that you want to forward emails from.
- Go to the Settings > Forwarding and POP/IMAP tab.
- In the Forwarding section, click Add a forwarding address.
- Enter the email address you want to forward your messages to.
- Select whether you want to keep a copy of the emails in your inbox or delete them after forwarding.
- Click Save Changes.
Additional Tips:
- You can forward emails to multiple addresses.
- You can use filters to forward emails to different addresses based on specific criteria.
- You can set up a vacation responder to automatically forward emails when you're out of the office.
Benefits of Automatically Forwarding Emails:
- Keeps your inbox organized: By forwarding emails to a separate account, you can keep your inbox clutter-free and make it easier to find the messages you need.
- Ensures important messages don't get lost: If you check your forwarded email account regularly, you'll never miss an important message.
- Can be used for collaboration: If you need to collaborate with others on email, you can forward relevant emails to them.
Automatically forwarding emails in Gmail is a simple and effective way to manage your inbox and ensure that you never miss an important message. By following the steps above, you can easily set up email forwarding for your specific needs.
RELATED ARTICLES
How to Transfer Your Domain Name to a New Registrar

How to Point Your Domain Name to Your Web Hosting
How to Track Your Website Traffic

DirectAdmin for Beginners: A Step-by-Step Guide to Installation and Configuration

The Top 8 Best Web Hosting Solutions in Canada for 2024
How to enable Two-Factor Authentication for DirectAdmin

SEO Over-Optimization: 10 Signs You're Going Too Far

Enhance cPanel Security with Two-Factor Authentication (2FA): A Comprehensive Guide
